Advanced Widget Integrations
This is the most customizable option for integrating with the wheelbase system. It allows you to include a small js library which will load all of the required components. From there, you have the ability to drop widgets on the page as needed. Users have full control over the styling of all widgets and search results. Widgets are all mobile friendly and include:
Creating a Search Page
Widgets work by embedding themselves into elements that you provide on the page. To give you a quick example of how this works, we’ll create an example project. We’ll use Bootstrap for some basic styling, but this is NOT required to use the library - we’re just using it for the grids as a demonstration.
Load Dependencies
First we’ll load the style dependencies. Wheelbase provides a very light base stylesheet that provides the core components like sliders and date pickers. You’ll want to load a custom stylesheet after that to provide your own styling. Here are some skeleton stylesheets you can use to get started:
<link rel="stylesheet" href="https://d3cuf6g1arkgx6.cloudfront.net/sdk/1-5/wheelbase-widget.css">
<link rel="stylesheet" href="/custom-styles.css">
Once your styles are loaded, you’ll need to include the wheelbase-widgets SDK
<script type="text/javascript" src="https://d3cuf6g1arkgx6.cloudfront.net/sdk/1-5/wheelbase-widget.min.js"></script>
Creating Widget Containers
Widgets need to be given containers that they can be created inside of, so the first step is going to be creating a basic site structure for widgets to use. Here’s an example, but you’re welcome to do this however you’d like. We’re going to assume you’re using the bootstrap grid system for the demo, but it’s not required.
<body>
    <div class="container">
        <div class="row">
            <div class="col-sm-4">
                <div id="date-container"></div>
                <div id="vehicle-type"></div>
                <div id="vehicle-price"></div>
                <div id="vehicle-tags"></div>
            </div>
            <div class="col-sm-8">
                <div id="rental-results"></div>
            </div>
        </div>
    </div>
</body>
Customizing Your Search Results
One of the best features of the widget system is the ability to customize how search results are displayed. There currently is no default template, so you’ll need to create one for yourself to get going. The templating system uses Hogan.js for templates. Here’s a basic example to get you started - just include the following on your page.
<script type="text/html" id="result-template">
      <div class="col-sm-4">
        <a href="/rental/{{id}}">
          <div class="rental-result">
            <div class="rv-img">
              <div class="rv-image-container">
                <img src="{{primary_image_url}}" alt="{{name}} in {{home.city}}, {{home.state}}">
              </div>
              <div class="price">${{price.day}}<span class="price-info">/night</span></div>
            </div>
            <div class="rv-info">
              <div class="rv-title">{{name}}</div>
              <div class="rv-subtitle">
                <span class="pull-right">
                  <i class='fa fa-heart favorites-count'></i> {{score}} / 5
                </span>
                {{home.city}}, {{home.state}}
              </div>
            </div>
          </div>
        </a>
      </div>
</script>
<script type="text/html" id="unavailable-result-template">
      <div class="col-sm-4">
        <a href="/rental/{{id}}">
          Unavailable - {{name}}
        </a>
      </div>
</script>
You have access to all of the data we have stored for each rental, including:
{
      "description":"Vehicle Description",
      "features":{
         "air_conditioner":true,
         "audio_inputs":false,
         "awning":false,
         "backup_camera":false,
         "bike_rack":false,
         "burning_man_friendly":false,
         "cd_player":false,
         "ceiling_fan":false,
         "dining_table":true,
         "extra_storage":false,
         "fuel_tank":null,
         "fuel_type":null,
         "generator":false,
         "gray_tank":null,
         "handicap_accessible":false,
         "heater":true,
         "hitch_weight":null,
         "hot_water_tank":false,
         "inside_shower":true,
         "inverter":false,
         "kitchen_sink":true,
         "leveling_jacks":false,
         "microwave":true,
         "minimum_age":null,
         "mpg":null,
         "one_way_rentals":false,
         "outside_shower":false,
         "oven":false,
         "pet_friendly":true,
         "propane_tank":null,
         "radio":false,
         "refrigerator":true,
         "satellite":false,
         "sewage_tank":null,
         "skylight":false,
         "slide_outs":1,
         "smoking_allowed":false,
         "solar":false,
         "stove":true,
         "tailgate_friendly":false,
         "toilet":true,
         "tow_hitch":false,
         "trailer_weight":null,
         "transmission":null,
         "tv_dvd":false,
         "washer_dryer":false,
         "water_tank":null,
         "wifi":false
      },
      "home":{
         "city":"Hutto",
         "lat":30.599,
         "lng":-97.589,
         "state":"TX",
         "street":"1751 CR 107",
         "zip":"78634"
      },
      "id":5121,
      "score": 4, // rating out of 5
      "score_count": 16, // how many reviews
      "favorite_count": 5, // how many people have favorited
      "primary_image_url": "image-url-here"
      "images":[
        {IMAGE OBJECT...}, ...
      ],
      "instant_book":true/false,
      "instant_book_leeway":3,
      "insurance_coverage":"",
      "insurance_state":"approved",
      "minimum_days":3,
      "name":"2016 Forest River Flagstaff Micro Lite",
      "owner_id":741,
      "price":{
         "day":120,
         "security_deposit":500,
         "week":790,
         "month" : 1050.75
      },
      "published":true,
      "sleeps":2,
      "tax_rate_id":25,
      "type":"trailer",
      "vehicle":{
         "amps":30,
         "dry_weight":3988,
         "length":21,
         "make":"Forest River",
         "model":"Flagstaff Micro Lite",
         "year":2016
      }
   }
Initializing your App
Now that you’ve created a basic site skeleton, we’ll include a new JS file where we add your widgets to the page
var wheelbase = Wheelbase({
    accountId: your-id,
    urlParams: true,
    currency: 'USD'
});
It’s a good idea to enable the urlParams feature, as that’ll allow your renters to share links with friends to search results and also keep things like dates in sync between pages.
for currency, the following currencies are supported:
const currencySymbols = {
  USD: '$',
  CAD: '$',
  AUS: '$',
  EUR: '€',
  GBP: '£',
  INR: '₹',
  JPY: '¥',
};
Adding Widgets To The Page
To finish adding widgets to your page, you can call the addWidget function on your app.
wheelbase.addWidget(WidgetObject, "container-element-id", {options})
For example, here’s how we could add widgets to the skeleton page we created above.
// first we add the widget for displaying results
// To begin, we'll load up the template you included in your page
var resultsTemplate = document.getElementById("result-template").innerHTML;
var unavailableTemplate = document.getElementById("unavailable-result-template").innerHTML;
// now add the widget to the page
// we're also providing custom classes, this is completely optional
wheelbase.addWidget(wheelbase.widgets.RentalList, "rental-results", {
    template: resultTemplate,
    unavailable: unavailableTemplate, // optional, will just hide unavailable results if no template provided
    cssClasses: {
        root: "custom-result-container",
        singleItem: "custom-result"
    }
});

// now lets add the search widgets
wheelbase.addWidget(wheelbase.widgets.TypeList, "vehicle-type", {
    cssClasses: {
        root: "rental-type"
    }
});

// to simplify the process, we'll stop including custom classes, but all
// widgets support them
wheelbase.addWidget(wheelbase.widgets.PriceRange, "vehicle-price");
wheelbase.addWidget(wheelbase.widgets.DatePicker, "date-container");
Starting the Widget Interface
Once you’ve added your widgets, you’ll just need to start up your app
wheelbase.start();
Customizing widgets
All widgets provide at least some level of customization, either via CSS or custom templates.
CSS Customization
For CSS, you have the ability of using the provided wheelbase classes, or you can pass in your own. The basic structure for passing in your own classes is:
wheelbase.addWidget(widget, container-el, {
    cssClasses: {
        root: "custom-class",
        etc...
    }
});
Each widget will specify the classes that are available for passing in.
Custom Templates
Most templates also allow you to pass in a template to take even more control over the widget interface. Templates can be either a string or a function which returns a string. Templates are written using Hogan.js.
If you decide to pass in a function, the arguments will be the same data used to render your Hogan templates. Feel free to do any custom changes necessary and return a resulting Hogan template.
Checkout the example in the start of this guide for more information on how templates work.
Rental List
This is one of the main elements for a search interface, it allows you to set the templates for search results as well as triggers the initial rentals load. Without this widget, rentals will never display on your page.
Initializing
wheelbase.addWidget(wheelbase.widgets.RentalList, "rental-container", {
    templates: {
        available: "{{name}} - {{id}} -- {{currentPrice.day}}<br>{{summary}}<br>--------------------",
        unavailable: "Unavailable - {{name}} - {{id}}"
    },
    filters: {},
    cssClasses: {
        root: ["test", "here"],
        singleItem: "rental-item"
    },
    sort: function(a, b) {
      let aSort = a.position || 1000;
      let bSort = b.position || 1000;
      if (!b.available) {
        return -1;
      }
      if (!a.available) {
        return 1;
      }

      return aSort - bSort;
    }
});
Options
templates.available- required This is the main tempalet for displaying resultstemplates.unavailable- optional This is displayed if the rental is not available. If you don’t include this, unavailable rentals will not displayfilters- optional by default, all rentals are loaded. If you include filters, then we’ll only load matching rentals.- There are a ton of rental filters you can use, please ask for specific directions. Note that most filtering will take place locally, yo should only add filters here if you want some rentals to never show in results.
location_ids- specify a list of locations to include, format: “1,2,3”
sort- optional by default, listings are sorted by availability and your wheelbase sorting options. You can pass in a sort function to override that functionality
Search Result Metadata
Show metadata on the current set of search results, for example: “Showing 17 of 35 available rentals”.
Initializing
wheelbase.addWidget(wheelbase.widgets.Metadata, "metadata-container", {
    template: "Showing {{totalVisible}} of {{totalFiltered}} matching rentals"
});
Available Template Data
currentPage- Current page you’re looking atperPage- how many results per pagetotalRentals- total vehiclestotalFiltered- total vehicles matching current filterstotalVisible- number of vehicles currently on the page including pagination
Customization
template- function or template string
Clear Filters
At any time, you have the ability to clear the existing filters on the search results. To do so, simply call:
wheelbase.clearFilters()
For example, you could do this on a button click in as simple as
<a href="" id="clear-filters">Clear Filters</a>
<script>
$("#clear-filters").click(function(e) {
    e.preventDefault();
    wheelbase.clearFilters();
});
</script>
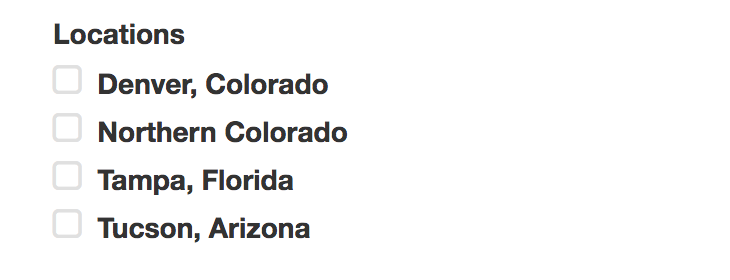
Location Filter
Automatically loads available locations and allows filtering by one or many. Locations can be added/removed in your Wheelbase dashboard.
Initializing
wheelbase.addWidget(wheelbase.widgets.LocationList, "locations-container", {
    cssClasses: {
        root: "rental-location-container",
        listItem: "rental-location",
        listItemLabel: "rental-location-label"
    },
    template: function(data) {
        //optional
        return "{{label}}";
    }
});
Customization
The cssClasses above are an optional way for you to take control over the classes used on the widget.
You can also pass in a template as either a string or a function which returns a string.
Date Picker
The date picker allows your renters to select a date range they’re interested in renting a vehicle for. If you include a vehicle ID when initializing, then we’ll also load availability information so that renters know when the unit is free.
Initializing
wheelbase.addWidget(wheelbase.widgets.DateRange, "dates-container", {
    rentalId: 1426 // optional, only include if this is for a specific vehicle
});
Customization
The main point of customization for the datepicker is going to be through CSS for adjusting colors. Check out the starter CSS file to learn more.
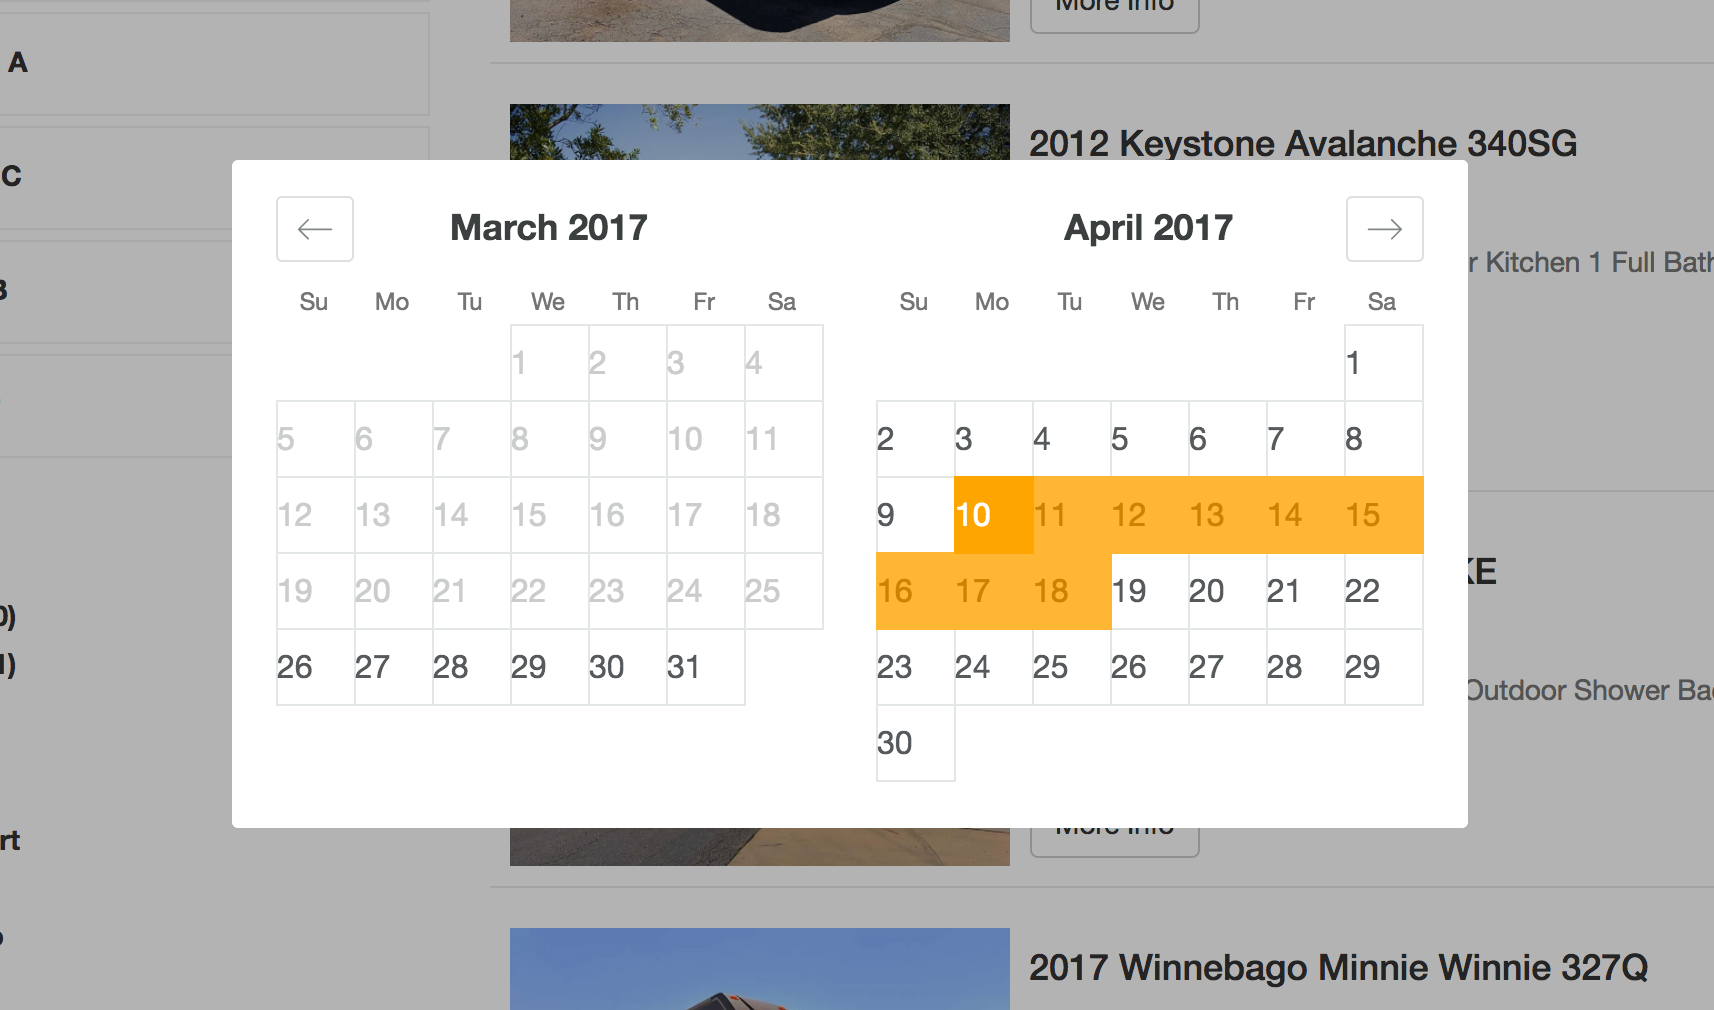
Availability Calendar
You can also use the date picker to display an embedded availability calendar for your vehicles. Using the embedded availability calendar is very similar to the above date picker
Initializing
wheelbase.addWidget(wheelbase.widgets.DateRange, "availability-calendar-container", {
    rentalId: 1426,
    embedded: true,
    numberOfMonths: 2 // optional
});
Customization
In addition to the same CSS customization above for the date picker, you can also indicate the number of months you’d like to show by including a numberOfMonths config option. If you don’t include one, we’ll default to either 1 or 2 months depending on the screen size of the user. We recommend that you do something similar if you’d like to customize this. If you only indicate 3 months for example, there’s a large likelihood that the calendar won’t display correctly on mobile devices.
Pagination
The pagination component adds a pagination bar to the page
Initializing
wheelbase.addWidget(wheelbase.widgets.Pagination, "pagination-container", {
    perPage: 10,
    cssClasses: {
        container: "container",
        subcontainer: "subcontainer",
        activePage: "active-page"
    }
});
Customization
The main point of customization for the pagination component is going to be through CSS.
Vehicle Type Filter
The vehicle type filter allows your renters to filter their vehicle options by a specific vehicle type, such as Class A, Class B, etc…
This widget only shows vehicle types that are available in your current Wheelbase listings.
Initializing
wheelbase.addWidget(wheelbase.widgets.TypeList, "type-container", {
    cssClasses: {
        root: "rental-type-container",
        listItem: "rental-type",
        listItemLabel: "rental-type-label"
    },
    template: function(data) {
        //optional
        return "{{label}}";
    }
});
Customization
The cssClasses above are an optional way for you to take control over the classes used on the widget.
You can also pass in a template if you’d like as either a template or a function which returns a template
Checkbox Filters
This widget allows you to use either a dynamic or static list of checklist items to filter results.
Initializing
wheelbase.addWidget(wheelbase.widgets.CheckboxFilter, "checkbox-container", {
    filterId: "custom-filter-id",
    cssClasses: {
        root: "fuel-type-container",
        listItem: "fuel-type",
        listItemLabel: "fuel-type-label"
    },
    options: function(currentRentals, rentalMeta) {
        return [
            {
                label: "Label here",
                value: "Value here"
            }
        ]
    },

    template: function(option) {return "{{label}}";},

    filter: function(rental, selected) {
        return true;
    }
});
filterId- required. this is used to store user selections. It must be uniquetemplate- optional. You can pass in either a template or a function that returns a templateoptions- either an array or a function that accepts both acurrentRentalsarray and arentalMetaobject. The function should return an array that represents the options given to a shopper.currentRentals- An array of currently visible rentals on the page, including other filtersrentalMeta- All the data we have, including all rentals, totals, max prices, min prices, etc…- Returns an array containing objects with the following fields:
label- What the shopper seesvalue- The value used for filtering
filter- A function that is given both a singlerentaland currently selected values.rental- A single rental, you’ll use this as well as the selected values to return true or false. True indicates that the rental should be visible according to this filterselected- An array of values currently selected
Select Tag Filters
Provides a drop-down select tag with full text search and optional multiselect.
Initializing
wheelbase.addWidget(wheelbase.widgets.SelectFilter, "select-container", {
    cssClasses: {
        root: "fuel-type-container",
        listItem: "fuel-type",
        listItemLabel: "fuel-type-label"
    },
    options: function(currentRentals, rentalMeta) {
        return [
            {
                label: "Label here",
                value: "Value here"
            }
        ]
    },
    filterId: "custom-filter-id",

    filter: function(rental, selected) {
        return true;
    },

    multi: true/false // allows user to select multiple values
});
filterId- required - this is used to store user selections internally. It must be unique.options- either an array or a function that accepts both acurrentRentalsarray and arentalMetaobject. The function should return an array that represents the options given to a shopper.currentRentals- An array of currently visible rentals on the page, including other filtersrentalMeta- All the data we have, including all rentals, totals, max prices, min prices, etc…- Returns an array containing objects with the following fields:
label- What the shopper seesvalue- The value used for filtering
filter- A function that is given both a singlerentaland currently selected values.rental- A single rental, you’ll use this as well as the selected values to return true or false. True indicates that the rental should be visible according to this filterselected- An array of values currently selected
multi- Default false. If true, users can select multiple values from the dropdown
Price Slider
Allows you to filter results by price using a slider

Initializing
wheelbase.addWidget(wheelbase.widgets.PriceRange, "price-container", {
    cssClasses: {
        root: "rental-price"
    }
});
Quote Widget
Provides a quote widget that shows pricing information for selected dates
Initializing
wheelbase.addWidget(wheelbase.widgets.Quote, "quote-container", {
    rentalId: 1426, //your rental ID
    template: {
     error: "{{error}}",
     noQuote: "before-quote-entered",
     quote: function(quote) {
         return "quote received";
     }
    },
    cssClasses: {
        root: "base-class",
        lineItem: "wheelbase-line-item",
        lineItemDescription: "wheelbase-line-item-description",
        lineItemPrice: "wheelbase-line-item-price",
        lineTotal: "wheelbase-line-total",
        lineSubtotal: "wheelbase-line-subtotal",
        lineTax: "wheelbase-line-tax",
        lineServiceFee: "wheelbase-line-service-fee",
        error: "wheelbase-quote-error"
    }
});
Customization
template.error- string or function (returns a template string) for what to display when an error is received from the backend.template.noQuote- string or fucntion (returns a template string) for what to display when no dates have been entered yet.template.quote- string or fuction (returns a template string) for what to display when a quote has been successfully receieved.rentalId- rental ID for the vehicle being quotedcssClasses- custom classes
The templates for Quotes tend to be a bit more involved than the rental list items, just by nature of having an unknown number of add-ons included. There a are a few ways you can handle this. Hogan.js, the library we use for templating, provides full mustache support, so the iteration/conditional options available in mustache are also available in Hogan. Also, you could provide a function and build up your own template that way.
Review List
Displays a list of reviews for a single rental or all rentals.
Initializing
wheelbase.addWidget(wheelbase.widgets.ReviewList, "reviews-container", {
    rentalId: 1426, //your rental ID, this is optional. if omitted we'll load the user reviews for all rentals
    template: "review template or function",
    filters: {
        limit: 4, // return only 4 reviews
        score_gte: 4 // return only 4 and 5 star reviews
    }
});
Customization
template- function or template stringrentalId- rental ID for the vehicle you want reviews for. Can be ommitted to view reviews of all vehicles
List Add-Ons
Allows you to list all the available add-ons for this vehicle based on your Wheelbase settings.
Keep in mind
This is meant to be a read-only view of add-ons, but if you combine it with the quote functionality mentioned in the advanced section, you can create your own front end shopping experience. This is an advanced option and not intended to be used without some developer help.
Initializing
wheelbase.addWidget(wheelbase.widgets.AddonList, "addons-container", {
    rentalId: 1426, //your rental ID, required
    template: function(data) {
        return "your template here";
    },
    filter: function(addOn) {
        // optional, allows you to filter add-ons so you only display the ones that match any criteria.
        // this will only show the add-on with an ID of 1, for example.
        reutrn addOn.id === 1;
    }
});
Customization
template- function or template stringrentalId- rental ID for the vehicle being quotedfilter- limit the add-ons that display for this widget
Building Custom Widgets
More Documentation Coming
This section is a work in progress. Please feel free to reach out to [email protected] with any questions if you have trouble getting started
It’s easy to extend the Wheelbase widget system by creating your own custom filters. A filter is a function that:
- Accepts a container element and an options object
- Returns a JS Object with a
startfunction that accepts a dispatch variable
For example, the most basic plugin would be:
var customWidget = function(container, options) {
    return {
      start: function(store) {
        console.log("yay!");
      }
    }
  }
To add your widget to the page, you’d just call it like any other widget
wheelbase.addWidget(customWidget, "element-id", {key: value});
We’ll initialize your widget, and call the start function when you start your app.
Changing Filters With Custom Widgets
To adjust how rentals are being filtered on the page from your custom widgets, you can emit a FILTER_RENTALS event with your desired filters. For example:
var customWidget = function(container, options) {
    return {
      start: function(store) {
        store.dispatch({
          type: "FILTER_RENTALS",
          selected: "new-value", // optional, used for information only
          filter: function(rental) {
            return true;
          },
          filterId: "rental-fuel-type" // required, but can be made up as long as it's unique
        });
      }
    }
  }
selected- Optional. You can include the newly selected value with your filter request and we’ll save it in the state. If you subscribe to events (below), you’ll get this value back each time something changes.filter- Required. A function that’s used for determining if a rental should be displayed according to this filter. The function receives a single rental, return true to display or false to hide.filterId- Required. Used to reference the filter results internally. Must be unique.
Adjusting primary filters after the library has loaded
In some cases, you’ll need the ability to adjust which rentals have been loaded on the initial request, similar to your initial filters object when initializing Wheelbase, you can also call wheelbase.updateFilters({}) with a new filter object to reload rentals.
wheelbase.updateFilters({type: 'a'})
Change the dates/loading new quotes with Custom Widgets
You can also trigger a request to update the availability and pricing when a renter selects dates. To do so, emit a CHANGE_DATES event. For example:
var customWidget = function(container, options) {
    return {
      start: function(store) {
        store.dispatch({
            type: "CHANGE_DATES",
            startDate: "2017-01-01",
            endDate: "2017-01-15"
        });
      }
    }
  }
This will immediately trigger a request for updated pricing/availability and update the view accordingly.
Working With Existing Data
We give you access to quite a bit in your custom widgets. You can subscribe to data updates and trigger an action whenever something changes. Here’s an example:
var customWidget = function(container, options) {
    return {
      start: function(store) {
        store.subscribe(function() {
          var data = store.getState();
          console.log(data.filters);
        });
      }
    }
  }
Custom Reservations
The Wheelbase JS SDK provides you the ability to create custom quotes for your shoppers and initiate reservations without leaving your site. The bulk of the checkout process wills till be handled by Wheelbases, but the first step can be handled on your end to provide a more seamless interaction.
Advanced usage
This section is intended for companies with on-hand developers who are committed to building a fully custom reservation interaction. For most integrations, we recommend that you rely on our default checkout process to complete your reservations.
Adding add-ons to a vehicle quote
Once you’ve setup your vehicle page with date selection and quote display, you can allow shoppers to customize their quotes with optional add-ons. For example, if you’re attempting to add an add-on of ID 1 to a quote, you could call:
let addonId = 1; // the add-on's ID
let addonCount = 1; // how many of this add-on we want
wheelbase.addAddon(addonId, addonCount);
This is useful when combined with the AddonList widget documented above. For example, consider the following example, which will display the add-on with ID 1 with the provided template into the addon-1 div, and also provide a button for adding that add-on to the shopping cart.
<div id="addon-1"></div>
<div class="addon-1-button">
    <a href="" id="add-addon-1">Add to Trip</a>
</div>

<script>
 wheelbase.addWidget("wheelbase.widgets.AddonList, "addon-1", {
     filter: function(addon) {
         return addon.id === 1;
     },
     template: "{{name}} - {{price}}"
 });
 $("#add-addon-1").click(function(e) {
     e.preventDefault();
     wheelbase.addAddon(1, 1);
 });
 </script>
Initializing reservations from your site
Once a user has customized their reservation with add-ons, you have the ability to initiate a reservation from your site. We won’t dive into the specifics on how to start this process, as the options would be up to your team to decide on. You could create a form on your page to collect renter information, initiate a modal, have users already logged in, etc…
Once you have your renters reservation info and contact details, you can initiate a quote with the following command, which returns a promise:
 wheelbase.startBooking({
     firstName: "tim",
     lastName: "smith",
     email: "[email protected]",
     phone: "555-555-5555",
     rentalId: 7,
     campaign: '',
     source: '',
     medium: '',
     discountCode: 'asdf'
 }).then(function(url, bookingDetails) {
     console.log("reservation details if you need them", bookingDetails);
     window.location.href = url;
 }).catch(function(error) {
     alert("There was an error creating your reservation: " + error);
 });
We’ll pull the information from the users cart to collect start date, end date and selected add-ons and create the quote. It’ll then be up to you to forward the renter into the remainder of the checkout flow using the URL provided.
If you’d like to pass in your own add-ons and dates when creating a booking, you can do so as follows:
 wheelbase.startBooking({
     firstName: "tim",
     lastName: "smith",
     email: "[email protected]",
     phone: "555-555-5555",
     rentalId: 7,
     from: 'YYYY-MM-DD',
     to: 'YYYY-MM-DD',
     items: [{id: 1, count: 2}],
     campaign: '',
     source: '',
     medium: ''
 }).then(function(url, bookingDetails) {
     console.log("reservation details if you need them", bookingDetails);
     window.location.href = url;
 }).catch(function(error) {
     alert("There was an error creating your reservation: " + error);
 });
The downside to this is that you won’t be able to leverage the quoting features on the page prior to creating a booking.